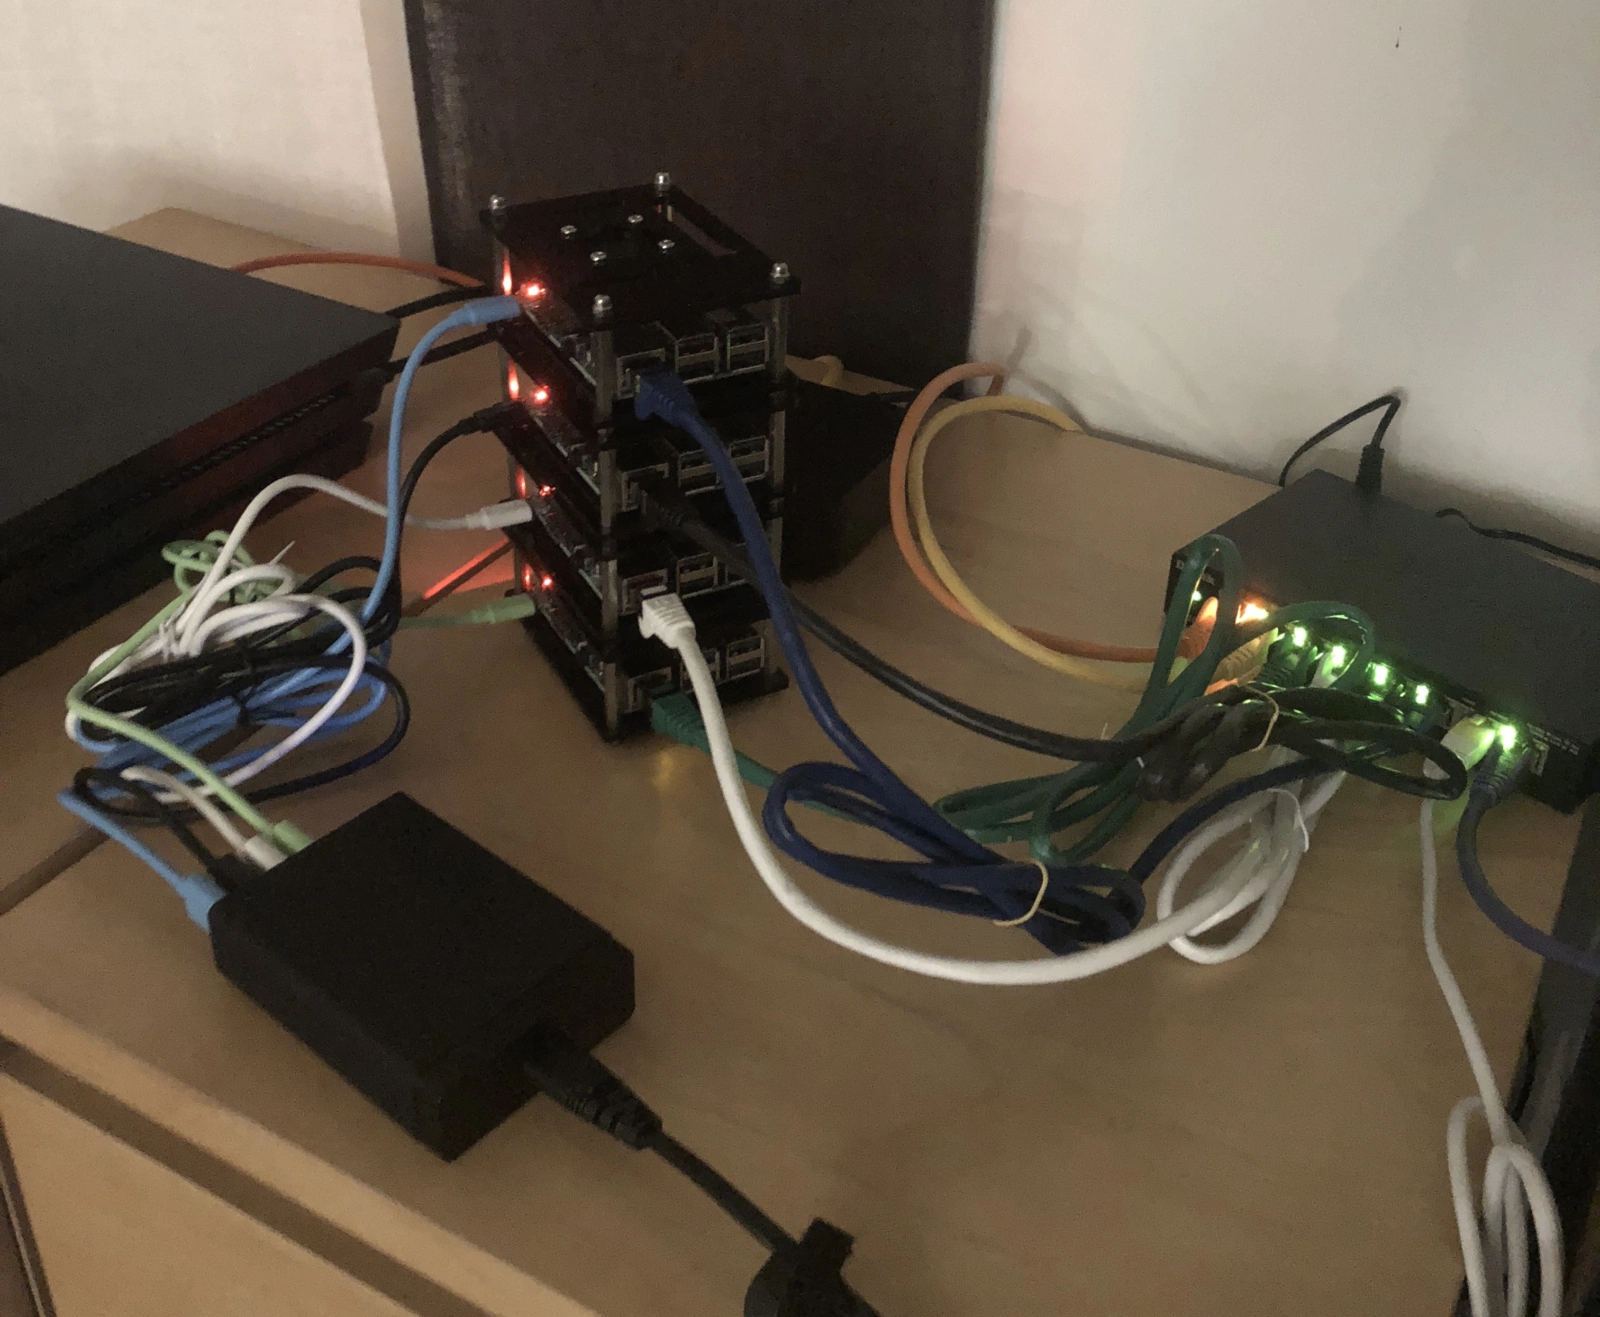
Selfhosted RaspberryPI based Docker Swarm Cluster
Introduction
I am renting virtual servers for a long time now to host different personal projects, including this website. I tried all of them: AWS, Google Cloud, DigitalOcean , Azure, and I was entirely satisfied with them until two weeks ago. Two weeks ago I came across the article where the guy described how easy is to set up a RaspberryPI cluster powered by Docker Swarm. This idea seemed exciting to me, so I ordered all the equipment and spent some time to set it up and move most of the services from DigitalOcean servers to my living room. During that time I faced a lot of unexpected difficulties and read most of the articles where people described how to set up the Docker Swarm cluster, but none of them completely covered everything I wanted to do, so here is another one.
Hardware Used:
- 4 x microSDHC 32 Pro Class 10
- 4 x Layer case for Raspberry Pi
- 4 x microUSB cable
- 5 x Gigabit Ethernet patch cable
- 1 x USB Charger for 6 ports
- 4 x Raspberry PI 3 Model B+
- 1 x 8-Port Gigabit Switch
Technologies used:
- HypriotOS - operating system for Raspberry Pi with preinstalled docker
- Docker Swarm - container orcestrator
- Minio - s3 compatible object storage
- rexray/s3fs - docker volume driver for s3 system
- s3fs (v1.8.4) - itself
- Prometheus / Grafana - for monitoring
- Traefik - reverse proxy and load balancer
Software
ARM
First of all, you should be aware that ARM architecture that Raspberry PI is
based on is a pain in the ass. Almost none of Docker images that you find are
going to work as you would expect, so that be ready to rewrite docker files and recompile binaries.
What really helps here is the --resolve-image never flag for deployment. Because
sometimes even if the image uses ARM compatible architecture, docker think
that it's amd64. You can find an example of a simple deployment script here
Here is the list of images I found good as a base:
- apcheamitru/arm32v7-alpine - for alpine based images. Use this one when possible, it's much smaller.
- arm32v7/debian:7.11-slim - for Debian based images and when you are can't/lazy to use alpine.
Docker Swarm
Initially, I planned to use Kubernates for the cluster orchestrator, but change that for Docker Swarm, because it turns out much more straightforward to set up. However, it has some disadvantages according to DevOps experts on the Internet, one that I found is that if you want to have shared storage for your volumes across the cluster, you are going to waste a week to find a solution that works on ARM and it will just cause more problems, because it's super slow.
Traefik
For routing inside of the cluster, I use Traefik - a modern reverse proxy. What I liked about it has an integration with the docker API, so you don't need to describe all of your routes in a configuration file, you just put all containers in the same network and label them in the same compose file where you describe the container.
Prometheus, Grafana
The first thing you want to do after you have a working cluster is monitoring, so you know how much resources are in use and what's the best way to distribute them across the cluster.
As a source of data for the dashboards I use:
- node-exporter This provides the necessary node information like overall usage of RAM / SPU / SSD , disk read/write rate, network activity, etc.
- arm-exporter I use this to have information about Pi's temperature. It has a strict correlation with CPU usage, but you want to make sure it's never higher than 50C.
- cadvisor It provides information from containers point of view. How much of the allocated resources are in use by a service. For example, I have a limit of 256MB of RAM for Prometheus, so it goes down every day or so because OOM killer restarts it once the RAM usage crosses the limit. Thanks to this exporter I am aware of this and can increase the limit or do nothing (I do nothing)
Minio
After I configured the basic cluster, I faced a serious problem. Every time I update the cluster, and Docker Swarm decides to move a service to another node, your persistent data is lost, because by default Swarm supports only local volumes, it means that volume is mounter to the current node and you have to bother yourself syncing it between multiple nodes if you need to.
To have a shared volume, I have chosen Minio cluster and rexray as an s3fs volume driver. s3fs is a file system from Amazon that allows you to mount a bucket from s3 to the disk and store data there. Rexray allows you to use s3fs to create volumes. However, since I wanted to go full self-hosted, Amazon is not an option. That's why I use minio since it has fully compatible API with Amazon's s3. To configure all of that I had to build the Minio image because the one in their docker registry is one year old and didn't work because it wasn't fully UNIX compatible (mkdir didn't work). To make it work, you need an s3fs version higher than 1.82, and latest fuse version that you need to compile yourself. Also , you need a rexray plugin built for the ARM platform. You can find all of the images in my docker hub. However, I should warn you that when you manage to set this up, you find out that write speed is extremely slow and the solution for persistence is to bind a service to a node using placement constraints.
Migration
I used to deploy all services using docker compose. You can read about it here. The first step was to rewrite all compose files to version 3, so I can reuse them for Swarm deployment. The second step is to set up a cluster and expose it to the Internet. To avoid downtime, I created a test domain that was a base domain for all cluster services while I was testing it. When cluster was ready for "production", I changed DNS settings and pointer the real domain to cluster IP, so after DNS cache was updated, all users were migrated to the new cluster without noticing (let's pretend I have more than 20 daily visitors and they care about this blog).
Next plans are to set up DNS over HTTPS and VPN over HTTPS on the same cluster.